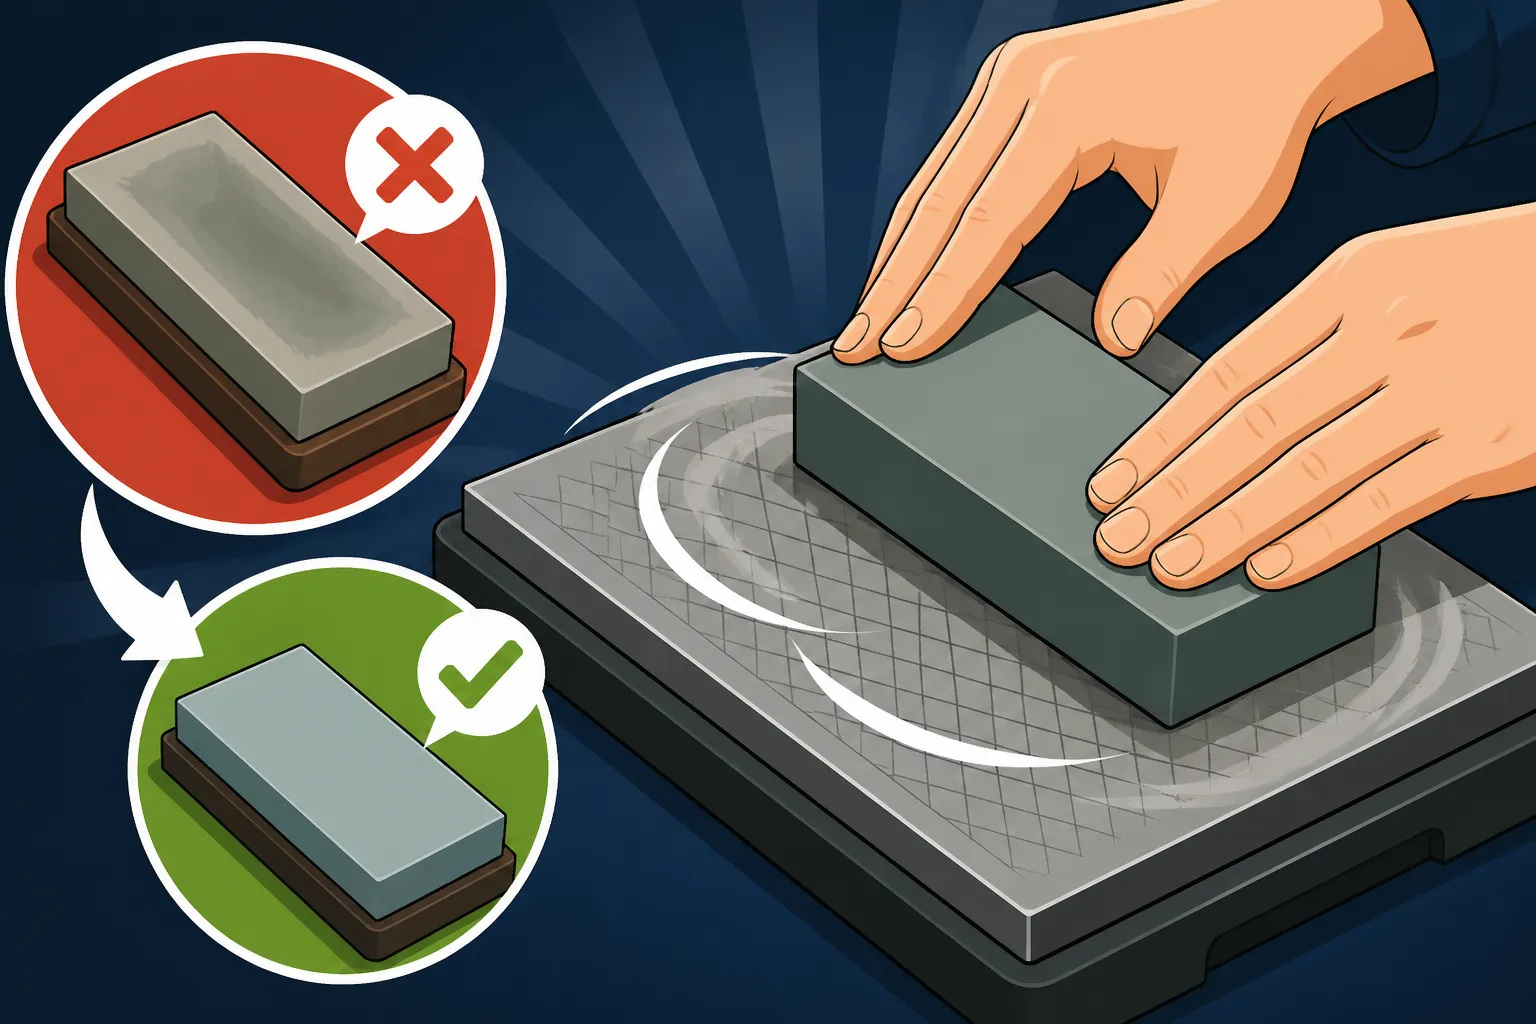
How to Flatten a Whetstone
Alright, fellow Japan dwellers, let's talk whetstones. You’ve got your beautiful Japanese knives, maybe even splurged a bit, and you’re committed to keeping them razor-sharp. But there's a secret enemy lurking in your sharpening routine: the dished whetstone. That subtle dip in the middle, unseen by the untrained eye, can completely sabotage your efforts, making your knife edges uneven and your sharpening sessions frustrating. This guide is all about conquering that enemy and bringing your whetstones back to perfect, flat glory, ensuring every stroke counts.
Why Flattening is Crucial: It’s Not Just About Aesthetics
You might think a little dip in your whetstone isn't a big deal, but trust me, after years of sharpening everything from inexpensive kitchen knives to high-end yanagiba for sashimi, I can tell you that a flat stone is the absolute bedrock of proper sharpening. Without it, you’re essentially trying to build a perfectly straight wall on a wobbly foundation.
Disclosure: This post may contain affiliate links. We may earn a commission at no extra cost to you if you make a purchase through these links. Read full disclosure.
Impact on Sharpening Performance
Imagine trying to sharpen a straight edge on a curved surface. It’s like trying to draw a straight line on a crumpled piece of paper; it just won't work. When your whetstone develops a hollow or "dish" in the middle, the blade of your knife will naturally follow that contour. This means that instead of creating a consistent bevel angle along the entire length of the blade, you'll end up with varying angles. The parts of the blade that hit the deeper sections of the dish will be sharpened at a different, often wider, angle than the parts that hit the higher edges.
For instance, if you're working on a gyuto (chef's knife), the tip and heel might make proper contact, but the belly of the blade, where it most often meets the stone, will wear down the middle, creating that dish. When you then try to sharpen, that dished area will cause a "belly" to form on your knife's edge, making it impossible to achieve a truly keen and uniform edge. This isn't just about getting a knife sharp, it's about getting it consistently sharp, which is what truly defines a well-maintained blade.
Consequences of a Dished Stone
Beyond simply hindering sharpness, a dished whetstone can lead to a host of other problems that will make you tear your hair out. First off, it significantly increases your sharpening time. You’ll find yourself grinding away, wondering why your knife isn't getting as sharp as it should, all because the contact points are uneven and inefficient. You’re essentially wasting effort.
Secondly, and perhaps more critically, it can damage your expensive Japanese knives. Trying to force an even edge on an uneven stone can lead to rounding the edge, creating what’s known as a "convex" grind where you really want a flat primary bevel, or even causing micro-chips if you’re applying too much pressure in an attempt to compensate for the stone's irregularities. For precision knives like a yanagiba or usuba that require incredibly flat, precise bevels for their specialized tasks, a dished stone is an absolute death sentence. It will utterly ruin the delicate geometry of the blade, and you might find yourself needing professional sharpening services to correct the damage, which can be costly and inconvenient. It’s far easier, and cheaper, to just flatten your stone.
Recognizing a Dished Whetstone: Don't Let it Sneak Up On You
Many new sharpeners, and even some seasoned ones, don't realize their whetstones are no longer perfectly flat until their knives start acting up. But there are a few simple ways to check, and it's something you should get into the habit of doing regularly, especially if you sharpen frequently.
Visual Inspection and Feel
The most basic way to check your stone is by simply looking and feeling. Run your fingers over the surface of the wet stone (always wet when inspecting to prevent inhaling dust!). Do you feel a slight depression in the middle? Sometimes, you can even see it if the dish is pronounced, especially if the stone has a two-tone appearance due to wear. The center might look slightly darker or more worn than the edges.
Another trick is to hold the stone up to eye level, lengthwise, and look across its surface. If you see a noticeable sag or curve in the middle, it's definitely time for a flattening session. Don't be shy about getting up close and personal with your stone; this tactile and visual inspection can save you a lot of grief down the line.
The Ruler or Straightedge Test
For a more precise and undeniable assessment, grab a straightedge. A metal ruler, the straight side of a credit card, or even the back of a knife (just be careful not to scratch it!) will do. Lay the straightedge flat across the width and then the length of your whetstone. Hold it still and look for any gaps between the straightedge and the stone's surface. If light shines through the middle, or if the ruler wobbles when you press on it, your stone is dished.
You can also use a pencil to mark a grid pattern on your wet stone. Then, gently rub the straightedge across it. The areas where the pencil marks are erased indicate the high spots, while the untouched marks show the low spots. This technique gives you a clear visual map of where the stone needs the most attention during flattening. Regular checks like these mean you catch the problem early, making the flattening process much quicker and easier.
Tools You'll Need: Your Arsenal Against the Dish
Now that you know how to identify a dished stone, let’s talk about the weaponry you’ll employ to fix it. There are several effective tools, ranging from specialized implements to everyday household items.
Lapping Plates
Lapping plates are purpose-built tools for flattening whetstones and are often considered the gold standard by serious sharpeners.
- Diamond Plates: These are robust and long-lasting, featuring industrial diamonds bonded to a metal base. They come in various grits, but for flattening whetstones, a coarser grit (like 120-400 grit) is usually preferred as it removes material quickly. The key advantage of a good diamond plate is that it remains perfectly flat itself, meaning it won't dish over time like your whetstone. Brands like Atoma or Shapton make excellent diamond plates that many knife enthusiasts swear by. You can find high-quality options through retailers like Hocho-Knife, who specialize in everything related to Japanese cutlery.
- Silicon Carbide (SiC) Plates: These are usually cast iron or glass plates embedded with silicon carbide grit. They are highly effective, especially for synthetic stones, and offer a very flat surface. The SiC grit is harder than most whetstone materials, allowing it to abrade the stone efficiently. You can also buy loose silicon carbide powder in different grits and use it with a flat piece of glass or tile. This method is incredibly versatile and cost-effective if you go for the powder.
Wet/Dry Sandpaper on a Flat Surface
This is often the most accessible and budget-friendly method, especially for beginners or those who don't flatten stones very often.
- Sandpaper: You'll need high-quality wet/dry sandpaper, usually starting with a coarse grit (around 120-220) and possibly moving to a finer grit (400-600) for a smoother finish, depending on the whetstone's initial surface. The "wet/dry" part is crucial as you'll be using water.
- Flat Surface: This is the most critical component. A thick pane of glass, a granite countertop, a ceramic tile, or even a very flat concrete slab will work. The surface absolutely must be perfectly flat, or you'll just transfer its unevenness to your whetstone.
Nagura Stone or Sarashi Cloth Method
These are more traditional Japanese methods, often used for natural sharpening stones or for maintaining a perfectly flat surface on new synthetic stones without aggressive removal.
- Nagura Stone: A small, softer stone (often a natural stone like a pure nagura from the Aichi prefecture, or even a softer synthetic stone) used to create a slurry on the surface of your main whetstone. While primarily for creating slurry and opening up the stone's pores, a nagura can also be used for very minor flattening on fine-grit stones. You rub it vigorously over the surface with water, and the abrasive slurry helps to slowly wear down high spots. It's a gentle method, not for severely dished stones.
- Sarashi Cloth on a Flat Surface: This is a very old-school technique using a coarse cotton cloth (sarashi) and silicon carbide powder on a very flat, hard surface like a granite slab. The cloth acts as a cushion to help distribute the abrasive powder, slowly grinding down the stone. This requires patience but can give very precise results, often used for high-end natural finishing stones where even a diamond plate might be too aggressive.
Choosing the right tool depends on your budget, how often you sharpen, and the extent of the dishing on your stones. But rest assured, with any of these methods, you'll be well on your way to a perfectly flat sharpening surface.
Step-by-Step Flattening Methods: Get That Stone Level Again
Now for the nitty-gritty! No matter which method you choose, the principle is the same: abrade the high spots until the entire surface is level. Always work with plenty of water to create a slurry, which aids in abrasion and prevents dust buildup.
Using a Diamond Lapping Plate
This is my go-to for most synthetic stones, especially coarser ones. It’s fast, efficient, and leaves a wonderfully flat surface. If you purchased your whetstone from a specialty vendor like Hocho-Knife, they often carry excellent diamond plates too.
- Prepare Your Workspace: Find a stable, flat surface. A kitchen counter is fine, but make sure it’s one you don’t mind getting wet and potentially a little messy. Place a non-slip mat or a damp towel under your lapping plate to keep it from sliding around.
- Wet the Stone and Plate: Thoroughly soak your whetstone (if it's a soak-and-use type) and splash water generously on your diamond plate. You want a good amount of water to create a slurry as you work.
- Mark Your Whetstone: Take a pencil and draw a grid pattern (or just parallel lines) all over the surface of your whetstone. These lines will be your visual indicator. As you flatten, the pencil marks will disappear from the high spots first. You know your stone is flat when all the pencil marks are gone.
- Rubbing Technique: Place the marked whetstone face down on the wet diamond plate. Apply gentle, even pressure and rub the whetstone back and forth across the entire surface of the diamond plate. Use figure-eight motions, straight lines, or circular motions – consistency is key. Make sure you cover the entire surface of the diamond plate with the whetstone to ensure even wear on both tools.
- Check Your Progress: Every 30 seconds to a minute, lift the whetstone, rinse off the slurry, and check the pencil marks. You'll notice the marks disappearing from the highest points first. Re-apply pencil marks if needed. Continue rubbing, re-wetting, and checking until all the pencil marks are completely gone from the entire surface of the whetstone. This might take a few minutes for a slightly dished stone, or longer for a severely dished one.
- Rinse and Clean: Once flat, thoroughly rinse both your whetstone and the diamond plate. A toothbrush can help remove any stubborn slurry from the diamond plate. Let your whetstone air dry completely before storing.
Using Silicon Carbide Powder on a Surface
This method is fantastic for its precision and affordability, especially if you have an extra piece of granite or thick glass lying around. FN Sharp often provides guidance on using abrasive powders for their range of sharpening tools.
- Secure Your Flat Surface: Place your chosen flat surface (glass, tile, granite) on a non-slip mat or damp towel on your counter.
- Prepare the Slurry: Sprinkle a small amount of coarse silicon carbide powder (e.g., 120 or 220 grit) onto your flat surface. Add a generous splash of water to create a thick, abrasive slurry. You don't need too much powder; a little goes a long way.
- Mark and Rub: As with the diamond plate method, mark your whetstone with a pencil grid. Place the marked whetstone face down onto the silicon carbide slurry. Using even pressure, rub the whetstone back and forth, covering the entire area where you've spread the slurry. Again, vary your motions (figure-eights, straight lines) to ensure even abrasion.
- Refresh Slurry and Check: As you work, the slurry will thin out and the powder will break down. Add more water if it gets too dry, or a tiny pinch more powder if it seems to lose its abrasive power. Lift, rinse, and check your pencil marks regularly. The goal is for all marks to disappear, indicating a perfectly flat surface.
- Clean Up: Once complete, thoroughly rinse your whetstone. Clean your flat surface and collect any remaining silicon carbide powder for future use, or dispose of it responsibly.
The Sandpaper Method
This is the most common entry-level method and works surprisingly well if done correctly. It's accessible and requires minimal specialized tools.
- Find a Truly Flat Surface: I can't stress this enough! The flatter the surface, the better your results. A thick piece of glass (like from an old picture frame), a well-maintained granite or quartz countertop, or even a sturdy, flat ceramic tile is ideal. Avoid thin glass or anything that might flex.
- Secure the Sandpaper: Place your chosen flat surface on a non-slip mat. Then, generously spray the surface with water and lay your coarse-grit (120-220 grit) wet/dry sandpaper onto it. The water will help the sandpaper adhere, preventing it from sliding around. Smooth out any air bubbles.
- Mark Your Whetstone: Pencil grid time! Mark the entire surface of your whetstone.
- Rubbing Action: Place the marked whetstone, face down, onto the wet sandpaper. Apply firm, even pressure. This is where consistency is crucial. Move the whetstone over the sandpaper in consistent patterns—straight lines, figure-eights, or circles. Make sure you use the entire surface of the sandpaper. If you only rub in the middle, the sandpaper itself will wear unevenly.
- Monitor and Replace: As the sandpaper's grit wears down and fills with slurry, its effectiveness will diminish. You'll need to periodically rinse the stone and sandpaper, re-wet, and potentially replace the sandpaper if it stops cutting efficiently or tears. Regularly check those pencil marks!
- Progress to Finer Grit (Optional): For a smoother finish, especially on finer grit whetstones (3000 grit and above), you might want to switch to a finer grit sandpaper (e.g., 400 or 600 grit) after the coarse grit has achieved a flat surface. Repeat the process until the desired smoothness is achieved.
- Final Rinse: Rinse your flattened whetstone and let it air dry.
Remember, patience and consistency are your best friends in whetstone flattening. Don't rush, and always use plenty of water!
Maintaining Your Whetstone's Flatness: An Ounce of Prevention
Flattening your whetstone isn't a one-time thing; it's an ongoing commitment, much like maintaining your knives themselves. But with good habits, you can significantly reduce how often you need to do a full flattening session.
Regular Flattening Schedule
How often you need to flatten depends on how frequently you sharpen and the type of stones you use. Softer stones, like some inexpensive combination stones or those with a higher clay content, will dish much faster than harder, more vitrified stones. If you're using your stones daily in a professional setting, you might need to flatten them daily. For home cooks sharpening once a week or so, a quick flatten every few weeks or once a month might suffice.
My rule of thumb is: check before every serious sharpening session. A quick ruler test only takes a few seconds, and catching a minor dish early means a much faster and less labor-intensive flattening process. It's much easier to take off a thin layer from a slightly dished stone than to try and excavate a deep canyon. This proactive approach saves time and extends the life of your whetstones. If you notice a particular stone dishes quickly, consider investing in a high-quality diamond lapping plate, available from stores like Hocho-Knife, as it makes the process almost effortless.
Proper Usage Techniques
Beyond regular flattening, how you use your whetstone plays a huge role in how quickly it develops a dish. Most people tend to sharpen the middle of the blade more, which naturally concentrates wear in the center of the stone.
- Utilize the Entire Stone Surface: Consciously try to use the full length and width of your whetstone during sharpening. Don't just focus on the middle. Move your knife around, using the top, bottom, left, and right edges of the stone. This distributes wear more evenly across the stone's surface. Think about it like mowing a lawn; you don't just go down the middle strip, you cover the whole area.
- Vary Your Strokes: Instead of always going in the same back-and-forth motion, try varying your attack angles and stroke patterns. Sometimes use long, sweeping strokes, other times shorter, more precise ones. This variation also helps to distribute the pressure and abrasive action across the stone more evenly.
- Rotate Your Stone: If you're sharpening a lot, consider rotating your stone periodically to ensure even wear. For example, turn it 180 degrees or flip it over if it's a double-sided stone (though double-sided stones often require different flattening techniques for each side due to their varying grits).
By adopting these habits, you'll not only keep your stones flatter for longer but also improve your sharpening technique overall. Just remember, a happy stone makes for a happy blade!
Common Pitfalls and Troubleshooting: Avoiding Sharpening Headaches
Even with the best intentions, you can run into a few snags when flattening your whetstones. Don't worry, these are common issues, and with a bit of knowledge, you can easily overcome them.
Uneven Flattening
This is probably the most common mistake, especially when using cheaper, less rigid flattening plates or the sandpaper method on an uneven surface. You might think your stone is flat, but a quick ruler test reveals new high and low spots.
- The Problem: If your flattening tool itself isn't perfectly flat (e.g., a cheap diamond plate that's warped, or a piece of glass with a slight bend), you'll just transfer that unevenness to your whetstone. Also, applying uneven pressure or not using the entire surface of your flattening tool can lead to this.
- The Fix:
- Verify Your Flattening Surface: Before anything else, ensure your diamond plate, glass, or tile is perfectly flat. Lay a known straightedge across it and check for light gaps. If your tool isn't flat, you're fighting a losing battle. A high-quality diamond lapping plate is an investment, but it guarantees a flat surface for years.
- Consistent Pressure: When rubbing the whetstone on the flattening tool, try to distribute your pressure as evenly as possible across the entire surface of the whetstone.
- Full Range of Motion: Don't just move your whetstone back and forth in a small area. Use sweeping motions that cover the entire surface of the flattening plate. Vary your patterns – figure-eights, straight lines, diagonal passes. This ensures even abrasion.
- Pencil Test is Your Best Friend: Re-mark your whetstone often with a pencil grid. Only stop when all the marks are gone from all parts of the stone. If marks keep appearing in the same spots, you know you're not getting even contact.
Choosing the Wrong Grit Lapping Plate
Picking the right grit for your lapping plate might seem minor, but it can impact both efficiency and the final surface finish of your whetstone.
- The Problem: Using a very fine grit lapping plate (e.g., 1000 grit diamond plate) to flatten a coarse whetstone (e.g., 220 grit) will take forever. Conversely, using an extremely coarse lapping plate (e.g., 80 grit) on a fine finishing stone (e.g., 8000 grit) can leave deep scratches, making the fine stone less effective at polishing edges.
- The Fix:
- Match Grit to Task: For aggressive material removal on coarse and medium whetstones (up to about 3000 grit), a coarse diamond plate (120-400 grit) or silicon carbide powder (120-220 grit) is ideal. It works quickly and effectively.
- Gentler for Fine Stones: For your finer finishing stones (4000 grit and above), you can still use a coarse diamond plate if the stone is severely dished, but follow up with a quick pass on a finer flattening method (e.g., a fine grit diamond plate or even your nagura stone) to smooth out any residual deep scratches from the flattening process itself. Some traditional sharpeners use a second, finer diamond plate to "condition" their finishing stones after initial flattening.
- Consider a 'Combi-Plate': Some manufacturers, like FN Sharp, offer diamond plates with two different grits on either side, giving you versatility for various whetstone types.
By being mindful of these common issues, you can flatten your whetstones like a pro, ensuring your Japanese knives always get the perfectly flat surface they deserve for ultimate sharpness.
Here's a quick comparison of common whetstone flattening methods:
| Method | Pros | Cons | Ideal For |
|---|---|---|---|
| Diamond Lapping Plate | Very fast, stays flat, durable, effective on all stone types. | Initial cost can be high, coarse grits can be aggressive on very fine stones if not careful. | Most synthetic whetstones (coarse to fine), frequent flatteners. |
| Silicon Carbide Powder/Slurry | Very effective, precise, relatively inexpensive (powder only), versatile. | Can be messy, requires a perfectly flat surface (e.g., glass/granite) as a base, requires careful handling of abrasive powder. | All stone types, particularly good for precise flattening, budget-conscious sharpeners. |
| Wet/Dry Sandpaper | Very affordable, accessible, good for beginners. | Sandpaper wears out quickly, requires frequent replacement, absolutely dependent on a perfectly flat backing surface, less efficient for severely dished stones. | Slightly dished stones, occasional flatteners, budget-conscious. |
| Nagura Stone | Traditional, creates a slurry, very gentle, good for maintenance. | Not for serious flattening (only very minor correction), slow, generally used for fine grit stones. | Natural finishing stones, light maintenance on fine synthetic stones. |
Ultimately, a sharp knife starts with a flat stone. Getting into the habit of flattening your whetstones regularly, using the right tools and techniques, will transform your sharpening experience and keep your treasured Japanese knives performing at their best for years to come. It’s one of those essential skills that once mastered, you’ll wonder how you ever managed without it. Happy sharpening!
Disclaimer
Please remember that while this guide offers comprehensive advice, individual results may vary. Always exercise caution when handling sharp tools and abrasive materials. The information provided is for general guidance and educational purposes only and does not constitute professional advice. For specific concerns, consult with a qualified knife sharpening expert or refer to product-specific instructions provided by manufacturers like Hocho-Knife or FN Sharp.
Internal Links
- The Complete Guide to Japanese Kitchen Knives: Types, Steel, and Buying
- How to Sharpen and Care for Japanese Knives: The Complete Guide
- Whetstone Grits Explained: Which Ones You Actually Need
- How to Use a Japanese Whetstone Step-by-Step
- Santoku vs Gyuto: Which Should You Buy First?
- Sakai Knives: The Heritage of Japan's Knife City
- How to Buy Authentic Japanese Knives Online with Worldwide Shipping
- Gyuto: The Japanese Chef's Knife Explained
- Yanagiba: The Sashimi and Sushi Slicer Guide
- Usuba: The Traditional Vegetable Knife Guide
- Japanese Knives for Beginners: Your First Knife and What to Avoid
- Best Whetstones for Sharpening Japanese Knives